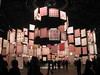
This is a step-by-step tutorial on how to make one of these:

First let me begin by saying that by no means am I claiming myself to be the brain or the genius behind this design. This has been done in many variations, but this is "my" way of doing it.
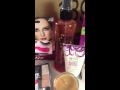
MATERIALS:
Scrapbook paper or Fabric but you will need heavy stabilizer for fabric
Scissors, circle template, 1 1/2" circle puncher or anything that will give you a nice circle
Glue or Tacky Glue or your own prefered method of piecing the pieces together
Ribbon or String to hang your ornament
and any embelishments (I used beads and a very tiny hint of glitter)
Optional (Glaze, I also used a glossy glaze for a glass-like effect)
Begin by either tracing your circle onto your paper or fabric, I used a template. By cutting and using 1 1/2" circle this will yeild you a 3 1/4" ornament.
 Make 20 circles and cut out if you haven't already

 Next, create and draw a triangle on a separate sheet of paper that will create even half spheres from your 1 1/2" circles. (What I did was trace my circle on a separate sheet of paper and drew a line from each end of the triangle and cut it out) You will need to cut out the triangle as it will be your guide on where to fold over the ends.
 Take one side and fold over making sure you fold it completely over one side of the triangle
 Do the same for the other side
 Last, fold over the bottom
 Press down with a little force on all ends to create the crease in your circle---it should look like this
 Do this for all 20 circles
 To create the top and bottom pieces you will need to take one of the folded triangles and apply glue to one side
 Take another triangle and join together by one side and have it look like so
 Repeat this using only 5 triangles
 When gluing the 5th piece your pieces should bend slightly downward, line edges together and then glue
.
 This is what the inside looks like (make 2 sets of 5 triangles glued together)
 For the remaining 10 triangles you will glue them together creating a chain. It will look as though you have one triangle pointing up and then the next pointing down
 This is all 10 glued together
 Now, take your chain and glue the ends together making the middle part of your ornament
,
again make sure that all ends match up

 Take one of your sets that you created for the top and bottom and glue it to the middle part of the ornament that you just created
 Repeat for the other end
,
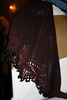
and you can end here.....
 I sprayed some clear gloss glaze to make my paper ornament shiny and have a glass-like appearance

Now decorate and embelish and if you want to hang it up, don't forget to add your tie, I super-glued my ribbon bow and made an extra loop so that it can be hung on the tree.
Hope you enjoy making them, just as much as I did!
---Did I leave out any parts? Any part of my tutorial hard to understand? Email me and I would be more than happy to assist you further.


.JPG)


.jpg)